What you will need
- Adjustable wrenches or a socket set
- Spirit level
- Tape measure
- Work gloves and eye protection
- A step ladder for the fan head

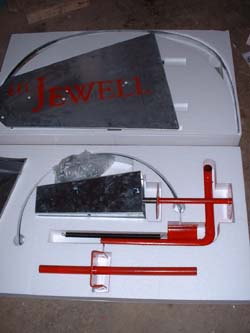
The windmill arrives as a bolted kit, so no welding and no specialist tools are needed. This page covers the sequence most owners follow. For exact figures and torque values, download the assembly and instruction manual (PDF, 36 pages).
Plan for help. The windmill head alone weighs around 120 lb. Two adults and a calm day make the job straightforward; wind and ladders do not mix.
Most installations are a half-day job for two people: a little longer for the 24 ft tower because it has three tower sections and a wider base.
Pick a position with three things: clear level ground for the base, enough working room to raise the tower sections without hitting a fence or branch, and clearance for the fan to swing on its pivot. Remember that the fan turns out of the wind in a gust, so leave space around the head, not just in front of it.
Strip the turf from the base area and level it. If the ground is soft, firm it before the tower goes up. The tower has to end up plumb: a tower that leans will not let the fan swing freely.
There are two accepted ways to hold the windmill down, and both are covered in detail in the manual:
Whichever you choose, check the base is square and level before you build upward.
The 16 ft tower has two tower sections; the 24 ft tower has three. Bolt the sections together loosely at first — enough to hold the shape — then check the tower is plumb in both directions with a spirit level and tighten everything down. Working loosely-then-tighten avoids pulling the tower out of alignment.
All fasteners are supplied with the tower. Tower legs are 2½ inch angles with a folded safety edge, braced by 1×1 inch angle diagonals.
If you ordered the platform, bolt the two supporting beams to the tower and fix the 1 inch thick deck on top. The platform adds character to the windmill, and it also gives you a safe standing surface for greasing and inspection later.
Lift the fan head onto the tower top and secure it, then fit the tail arms. Check that the fan spins freely by hand and that it swings away from the wind about its offset vertical pivot. If it binds, stop and re-check alignment rather than forcing it.
Safety first. Raise the tower with at least one helper, never work above a ladder alone in a breeze, and keep children and pets clear while sections are being lifted. If anything about the site feels marginal, contact us before you start.
The assembly and instruction manual covers the sequence step by step with diagrams, and should be read before you begin. The dimension drawings are useful when you are marking out the base.
Soil conditions, slope, wind exposure or tight spaces — send us the details and we will advise before you dig.